


Nexcelom's automated cell counters, image cytometry systems, and cell counting reagents and consumables are now part of Revvity's portfolio. They provide fast, reliable and efficient ways to assess cell health and viability, immunophenotyping, and a range of other cell-based assays.
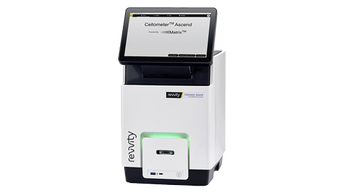
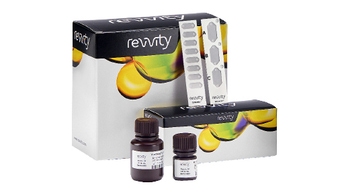
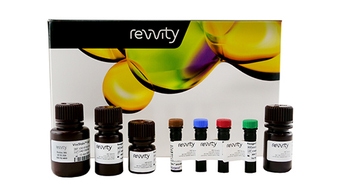
The systems include Cellometer™ automated cell counters, the Cellaca™ MX high-throughput cell counter, the Cellaca PLX image cytometer, and the high-throughput Celigo™ image cytometer. The instruments are complemented by reagents and kits for cell counting and cell viability assays, microplates, slides, and counting beads.
Explore our solutions


Explore applications
Here you can find information and protocols to support your use of these instruments, consumables and reagents.
Featured resources
Are you looking for resources, click on the resource type to explore further.
FAQs
-
Ordering/Purchasing
Question Answer How do I order consumables and reagents? You can order slides via www.revvity.com/shop We had to get a new laptop for our lab. Is it possible to purchase the Cellometer software without buying a new instrument? Yes. There is no charge to current users for the software if the Cellometer has been purchased through Revvity and/or its affiliated companies or an authorized distributor. Please contact cellc-support@revvity.com regarding the installation procedure. -
Sample preparation
Question Answer Do I need any special buffer or reagent for cell counting? No special buffer is required. Cells suspended in growth media or PBS are routinely counted. Trypan blue or AO/PI (part no. CS2-0106) is used for viability assays. For yeast counting and viability, the yeast cells need to be first diluted in a Yeast Dilution Buffer (available from Revvity) prior to staining with Yeast AO/PI (part no. CSK-0102). How can I minimize CV in my yeast samples? Try to have a high amount of yeast cells in the image. We suggest around 500 minimum. How do I deal with clumpy cells? There are a few ways to address clumpy samples. The first way is to make sure your sample has been adequately mixed using a pipette or a gentle vortex. After you’ve loaded the sample, make sure that your focus shows crisp, dark membranes, especially within the clusters. We suggest you first run a count and then visually QC the images using the “Counted” function. This will show you how the instrument is parsing the cells in these clusters. If you are concerned with the way that the software is de-clustering, please contact cellc-support@revvity.com. We can help you to analyze your sample to optimize the de-clustering parameters. How do I determine the dilution factor? The formula for dilution factor (DF) is as follows: DF = (final volume of cells + stain)/(initial volume of cells).
For example, if you mix your sample 1:1 with AO/PI, you’ll need to add 20 µL AO/PI to 20 µL cells, for a total of 40 µL. So, DF = (40 µL)/(20µL cells) = 2.
If you choose to dilute your cells prior to adding stains, you’ll also need to account for this in your DF.
Use the same formula, except now it looks like this: DF (final volume of cells & diluent)/ (initial volume of cells).
For example, if you dilute 20 µL of your cells in 40 µL of media, DF = (60µL)/(20µL) = 3.
To account for both stain and sample dilution prior to staining in this case, you would multiply these two dilution factors to get a value of DF=6.My yeast sample is dirty and has a lot of non-cellular debris. What is the best way to measure viability in this case? For yeast samples that display a lot of non-cellular debris in brightfield, we recommend using a mixture of acridine orange and propidium iodide (AO/PI). However, you must dilute your cells with our yeast dilution buffer prior to staining with AO/PI. The buffer adjusts the pH of the sample to optimize live/dead staining of the yeast cells. What would you say is the minimum pH a solution of cells needs to have in order for AO/PI to stain effectively? A pH of 7. Acidic Solutions make the AO staining ineffective. We recommend diluting your sample in media or neutral buffer to allow for a more neutral staining environment. When using PI as a stain, should we be diluting it and our samples with a 0.9% saline solution instead of sterile water?If so, why? It is preferable to dilute with a saline solution for two reasons. The first reason is that it creates a pH neutral environment (optimal conditions for PI staining). The second reason is that water can have some lysing effects on the yeast. -
Software/Data analysis
Question Answer Can I analyze the data on my computer? Is there an analysis software package I can install on my computer? A satellite computer with Celigo software can be purchased separately. These are specific computers that support the high image processing demands for image analysis. Can you image at different focal planes in the same scan? With the Celigo system, yes, use 5-channel Target 1+2+3+4+5 with image offset. How can I take a look at the data for an individual cell? After running a count, close out of the results page to take a look at your images. On the right-hand side of the screen, check the “Counted” box. This will circle the cells that the Cellometer counted in green, and the objects not counted in yellow. You can click on these individual cells to open a dialogue box. This box includes information on diameter, circularity, area, as well as fluorescent intensity (for fluorescent instruments). How can you quickly set up the exposure time of different channels in the scan tab on the Celigo system? Setup the focus for the channel that has content in every well first, e.g. brightfield or Hoechst stained cells. Then switch to another channel to setup the focus offset, then use the pixels in the objects to determine if the exposure needs to be increased or decreased. The pixel range is 0 (black) to 255 (white). Ideally, object pixels should be between 50-90% of that range (135-250). Repeat this for each of the channels. Save this as an experiment/project for settings to be automatically applied in the next scan. How do analysis parameters work, when to use them? Analysis parameters tell the software how to count the raw image of cells. You can adjust these to gate out cells based on their morphological characteristics such as size, roundness, etc. You can also adjust the parameters to selectively count cells based on their fluorescent intensities. Perhaps you only want to count the cells that are between 10-20 microns and have a bright GFP signal. In a way, analysis parameters allow you to inform the software based on the biological properties of your sample. How do I customize programs for different cell types? Please contact cellc-support@revvity.com. Our team can create personalized cell types and assays to suit your specific experiment. How do I set up parameters for a new cell type? Please contact cellc-support@revvity.com. Our team can create personalized cell types and assays to suit your specific experiment. How do I verify if my cells have been counted? For direct cell counting assays, click the “counted” button after counting your sample. The counted cells will be outlined in green, allowing you to visually verify that your target cells have been counted. For fluorescent-based assays, click the “counted” button after counting your sample. The target cells will be outlined in green, and excluded cells will be outlined in red. Additionally, for viability assays, the live cells are outlined in green and the dead cells are outlined in red. How does the Cellometer software count clumpy cells? The Cellometer software recognizes the bright centers of viable cells within clumps. Clumps can be de-clustered to count individual cells or remain counted as one, depending on the user’s selection. How does the Cellometer software count different size cells? Through cell type parameters, the user defines the size range to be counted. Depending on the application, different-sized cells can be included or excluded. This allows the same cell image to easily be analyzed for different cell types. I cannot display an image, why? There could be a few issues. First, we suggest taking a new background image. Make sure the instrument is powered on and connected to the computer via USB cable. If that does not work, try another USB port. If this is unsuccessful, please contact cellc-support@revvity.com I cannot see anything in the fluorescent channel images. They are completely black/green, what’s happening? If you cannot see anything in the fluorescent channels, first check the Assay Editor to make sure the correct lamps/modules are selected. Make sure the exposure time is set appropriately. If you see images that are too bright, reduce the exposure time incrementally until the ideal setting is found. If you have a sample of the fluorescent beads (shipped with all fluorescent instruments), prepare a slide of the beads. This is useful for confirming the instrument channels are working appropriately. I’ve loaded my sample, but the count button is greyed out, what is going on? You may have the “two-chamber assay” option checked within your software. You will need to uncheck that box and the count button will no longer be greyed out. You can do this by editing your assay and unchecking the box underneath the imaging mode box. Is the K2 software backward compatible? For example, can you recount images from 3.0.0.9 on 3.1.0.8? Yes, it can read images from older version of the software. Be aware the counting algorithms have had improvements in the newer versions of the software, and recounting old results might result in slightly different results due to the improvements. Using the Celigo image cytometer, what do you do when the segmentation results on ANALYZE Tab are different from the RESULT Tab? When in Analyze tab, switch the well view to whole well view. This will display all the images of the well and on-the- fly analysis will look at the whole well, not just the FOV. This is more inline with how the data set is analyzed and displayed in the Results tab. What are FOV and FOR and what are the differences? Field of View (FOV) is the area of one image that the camera can capture. Field of Regard (FOR) on the Celigo system is the area the galvanometer mirrors and camera can image without moving the stage. What are the computer requirements to run the Cellometer software? The specification sheet for each Cellometer instrument provides the requirements needed to run the Cellometer software. Find the specification sheet via the Revvity web page for your instrument. What does the Advanced BR/F mode do? Advanced BR/F mode, when turned on, uses the brightfield image to help decluster the cells. This is a setting you turn on in Cell Type parameters under “Fluorescent (FL)” tab. What is a “mask” and how do you use it? A mask or single mask is when one channel of a multichannel scan is used to identify objects of interest. The area of this object is analyzed for pixel intensity in the other image channels where they may or may not have a fluorescent signal. For example, Hoechst-stained cells are identified as the mask, and the second channel is green looking for GFP expression within that cell. This provides a total count and GFP count, therefore % GFP expression can be calculated. What is the area of the counting chamber analyzed? The area the Cellometer images and analyzes is similar to the area of 8 quadrants on a standard hemacytometer. Image A is roughly equivalent to 2 quadrants, Image B is roughly equivalent to 2 quadrants, Image C and D etc. What is the best way to focus on my sample? When you are focusing the instrument, use the knob on the side of the instrument (or the focus arrows on Cellometer Auto 2000) to adjust the focus. Make sure your sample is settled, as the focus might change as the cells settle into the slide. Then, adjust the focus until you see a bright-white center and a crisp, dark cell membrane for your cells. What is the difference between assay settings and cell type settings? Assay settings pertain more to the particular stain you are using to count cells/measure viability/etc. In these settings, you will edit exposure times, imaging mode, and the cell type corresponding to that particular assay. Cell type settings, on the other hand, get into the fine details of your cell morphology. For example, you can edit the size cutoffs for your cells, adjust the roundness value for more oddly shaped cells. You can keep all other aspects of an assay the same and change the cell type. What is the standard method of measuring viability in yeast cells? We recommend using propidium iodide (PI) to stain yeast cells. When I compare image A and image B, image B is darker. How can I fix this? The first step is to try taking a new background image. If this does not solve the problem, the power supply may be faulty. Please contact cellc-support@revvity.com
When I try to take a background image, I get a message saying the dim count is very low. What does this mean? This may mean that the LEDs need to be replaced in your instrument. Please contact cellc-support@revvity.com Why aren’t all my cells being outlined as counted? It may be that some cells are being excluded based on your parameters. The software may be excluding cells based on size, roundness, or FL intensity depending on the settings in your assay. To change these parameters, click the pencil button next to your cell type. Why does my sample look blurry? If you are using the SD100 slides, double-check to see that you have removed both strips of plastic from both sides of the slide. Leaving these on can create a strange, blurred effect in the image. Why is proper focus important? The proper focus (crisp dark membranes and bright white centers) helps the software to identify the cells, separate them from background noise, differentiate between live and dead cells, and decluster individual cells in a clump. Will cell debris be counted? No. In a typical cell culture, cell debris is smaller in size and different in morphology than live cells. The Cellometer software excludes debris because it will fall outside of the requirements to be counted as a cell. For fluorescent instruments, the debris will not be stained when using an enzymatic or nuclear dye. -
Support and training
Question Answer How do I reach support or submit a support ticket? Contact us via cellc-support@revvity.com or via www.revvity.com/contact-us How do I request training? Contact us via cellc-support@revvity.com or via www.revvity.com/contact-us -
Warranty
Question Answer How do I find warranty information? New Instrument Warranty Registration is from the first 12-months of the original ship date. Contact cellc-support@revvity.com for an extended warranty quote. How long are your reagents under warranty? Warranty is valid until the expiration date stated on the product label. Where can I register my instrument to receive warranty benefits? New instrument warranty is valid for 12 months from the date of product receipt. Contact cellc-support@revvity.com for an extended warranty quote. -
Miscellaneous
Question Answer How do I know if I have the correct fluorescent filters for a particular fluorophore? Consult your manual for the current filters installed in your system. Use the excitation/emission values to verify your fluorophore is detectable using an online spectral viewer. For more information use https://fluorofinder.com/ How do I know if my instrument counting correctly? Our cell counting and image cytometry instruments have built-in functions that allow for visual quality control. In Cellometer and Cellaca systems, this function is called “Counted”. After counting an image, check the “Counted” box. Toggle between the counted and the raw image to verify all your cells are being counted correctly. In the Celigo software, turn on the graphic overlay. If you have questions, please contact cellc-support@revvity.com How do I run my first sample? We recommend reading through the Quick Start Guide that is shipped with your instrument. If you are looking for more assistance, please contact our Support Team via cellc-support@revvity.com Should I turn off the instrument daily/or after each use? There is no requirement for turning the instrument off, but we would recommend turning it off once a week, for example, over the weekend. What are the emission and excitations of the VB-535-402 and VB-660-503 filters? The VB-535-402 has an excitation of 470 nm and an emission of 535 nm. The VB-660-503 filter has an excitation of 540 nm and an emission of 660 nm. What is the acceptable amount of variation between counts? In general, variation should be less than or equal to 10%. What is the password for the laptop that comes with my instrument? The laptops do not have passwords. The usernames are simply Cellometer (for Cellometer line instruments), Celigo, and Cellaca.

How can we help you?
We are here to answer your questions.